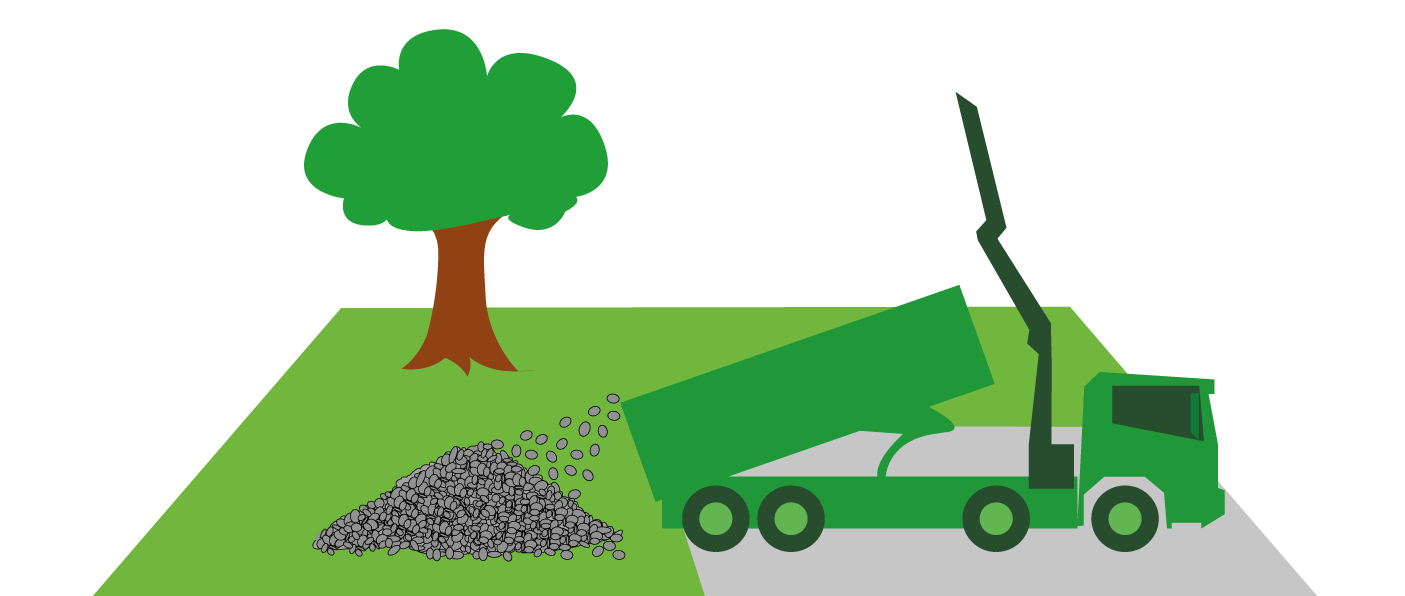
‘Decorative stone’ is a collective term used to describe different styles and sizes of rocks that are used to decorate your garden. Where grass struggles, these rocks prevail as they offer a low maintenance alternative to your usual – and labour intensive – living options.
For example, it is very difficult to grow healthy and green grass in areas such as:
This is for many reasons but mainly because these areas receive a lot more traffic compared to other areas within your garden such as flower beds and landscapes not suitable for walking. This, therefore, means they are worn down quicker.
As well as being a perfect alternative for the above areas, decorative stone has even more uses within the garden. Are your plants drowning in rain water? Are they over-exposed to the sun? Maybe your garden just needs a bit of character and texture in the less colourful areas.
This guide will show you how decorative stone is made; the vast amount of uses it can offer your garden and how, ultimately, it will be a beneficial investment.
This guide from GrabCo will show you:
Different rocks are created in different ways. For instance, brightly coloured and perfectly sized decorative rocks are not produced in the same way an irregularly shaped, natural looking rock is made.
Millions of years ago, a combination of heat, pressure, cooling, time and many other factors created – what we now call – ‘rock’. This same process still happens today and will do for thousands of years to come. The way rock is adapted and transformed after this natural cycle determines which category they belong to, either natural or artificial.

Both of these processes will result in beautiful stones to use for decoration in your garden, both with a number of different benefits. Choosing between the two depends fully on the design of your garden and what themes are used.
Gardeners from all over the world can reap the benefits from decorative stones in their gardens as they are produced in a wide variety of places around the globe! Due to the vast range of gardeners and designers that use the rocks, there is, as you can expect, many different types to choose from.
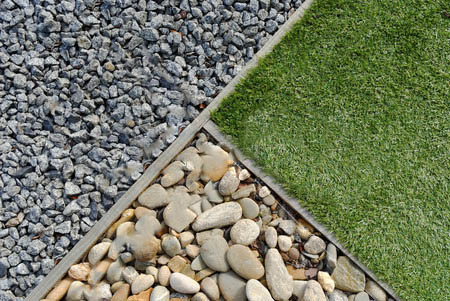
From large, texture enhancing cobblestones to round and smooth river rocks, it’ll be extremely difficult to not find at least one type of stone that suits your garden.
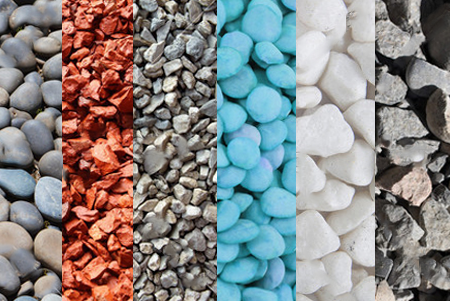
There is a huge selection of decorative stones with various different colours, shapes and sizes. Here is a list of just a few of the most popular ones in more detail:
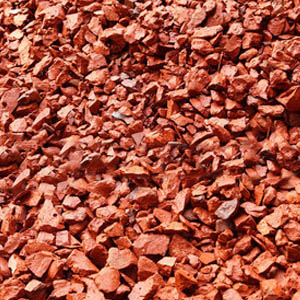
The simple process of crushing recycled bricks turns something useless into something with a number of features, brick chips. Whether you want chunky pieces or fine crumbs, the deep red and brown colours that naturally come with bricks are an attractive and attention-grabbing asset for your garden or driveway.
Specifically, brick chips are a great use for adding a bright, usually contrasting colour to slightly duller areas in your garden. as well as this, they can be used to improve driveways and be a great form of mulch.
Driveways can be drastically improved by replacing your current driveway material with brick chips. When installed properly, they will add a vibrant colour to the front of your home as well as lasting an extremely long time with hardly any maintenance.
The benefits continue:
Whether you’re a weekend gardener or a professional landscaper, you can find a beneficial use for brick chips.
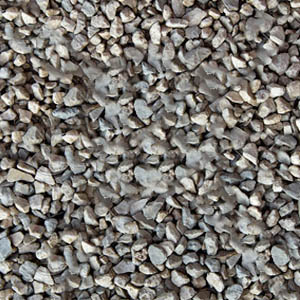
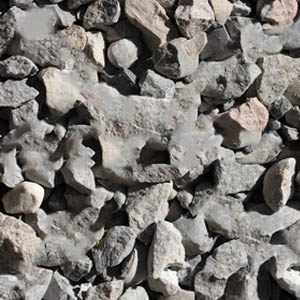
Perfectly described in the name, crushed gravel is simply rock that has been crushed into fine pieces. This type of decorative rock is available in a variety of sizes depending on what you plan to use it for – the most common sizes range from ¼ to ¾ inches.
This style of decorative stone has a large range of uses. You will usually find this rock in a grey colour or something similar, quite sharp round the edges and in any irregular shape.
These three features alone make crushed gravel a very adaptable product to use for multiple projects. A few examples of where you can utilise these properties effectively include: driveways, pathways, edging, base rock and basic ground cover.
Because of their irregular shapes, crushed gravel interlocks very well which means it provides superb packing. On top of this, by effectively tamping down the gravel, it will anchor to the ground and therefore keep its position even through heavy rainfall. This implies it will be of great use to driveways and a brilliant filler for decorative pathways.
By having the ability to anchor into the ground after being tamped, crushed gravel is also the perfect material to be a base rock. A base rock is the initial layer of material for a foundation that will be built on, this could be anything from a footpath to a flower bed.
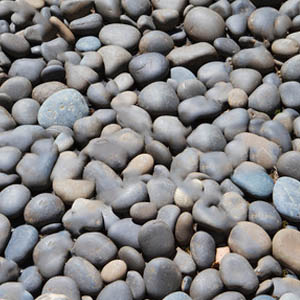
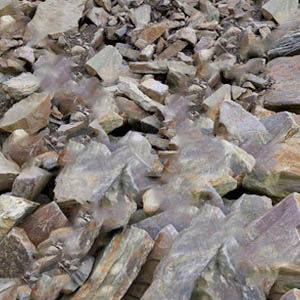
Also known as pebbles, river rocks are the result of a natural process involving running river water. To be classified as a river rock, it must have been shaped and rounded by the naturally running water from the river, hence the name.
Once classified as a pebble/river rock, they are separated by size and then have their own unique uses. They are usually found in a spectrum of brown and grey colours and are usually slightly larger than the crushed substances, ranging from half an inch to two and a half inches.
An excellent use for this rock is drainage, no one wants a clogged up garden filled with rain puddles but luckily this rock does a brilliant job of preventing that from happening. River rocks are the perfect addition to your swale to make it look better as well as improve its attempts at draining.
Due to being created in the presence of water, river rocks are one of the best for erosion control. As long as the weight of the rocks are equivalent to the amount of water force your vulnerable areas of erosion are receiving, then they can control the erosion. Their porous material will absorb the water that is causing the erosion instead of anything else, therefore preventing erosion in these targeted areas.
Be warned though, avoid using river rocks on sloped surfaces. Due to their rounded edges, your decorative stones will eventually travel down the slopes and end up in a pile at the bottom of it as gravity acts upon them. This is because their rounded edges make it a lot easier for them to move compared to some of the other stones.
As stated previously, if you crush rock you produce gravel. With this being said, technically cobblestone is gravel because it goes through the same process. The only difference is that cobblestones are much larger and so have different properties and uses.
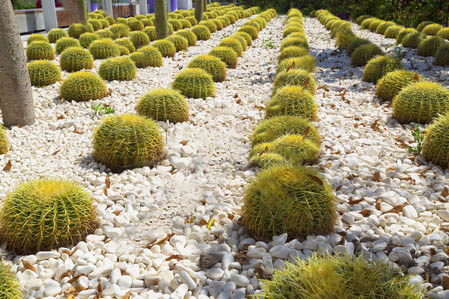
The sizes of these decorative stones range from 2 inches all the way up to 8 inches and the colours vary from greys to whites to browns. Because of the sizes of these rocks, they are great for being used as part of a dry creek bed and other similar landscape features where foot traffic is not desired.
Huge cobblestones are not the best type of rock to use as footpath material because they have a large and irregular shape which is not comfortable under the foot, that is why they’re mainly used in landscapes as decoration where walking is not permitted.
More great uses of cobblestone include:
On the whole, cobblestones have many specialist uses. Landscaping and ground cover are two of the most common uses, remember to hand place the stones in their desired positions as they are too big and heavy to be placed in the correct position in bulk.
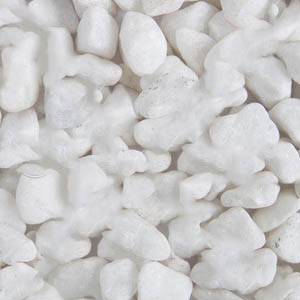
The decorative stone known as marble is made from marble fragments, it was once limestone but from a chemical reaction involving limestone and other substances, marble is formed.
It is usually a light-coloured rock, primarily white. However, the more impurities contained within the rock from its formation, the less white it will be; depending on what impurities the marble contains, it could end up being anything from pink to black.
Marble is slightly above the neutral level on the PH scale, this means it’s an alkaline and so reacts with acidic substances, reducing their acidity.
By crushing the marble into decorative stones, it becomes one of the most effective acid neutralising materials to use. The crushed marble can be used in lakes, streams and ponds to reduce acidity levels.
As well as this, using marble to cover soil will also react with any acids they come into contact with and so will aid the plants in their growth. Obviously, if your garden is home to some acid loving plants such as: Magnolias, Camellias and Azaleas, then do not use marble in your soil.
Not many other rocks have as many uses as marble. Most of them are related to large objects such as the Taj Mahal, Washington Monument, Cemetery markers, stairs and many more. But, they also have more uses related to the garden.
These include:
When you have a rough idea of what stones you want to use in your garden, you must then consider three main elements. These are simply: the colour, the depth of the area you are filling, and the base layer of your stones. After taking these factors into consideration, you will be ready to obtain the rocks best suited to your needs.

One of the most important factors to consider when selecting your stone is how deep you want them to fill the area. An area too shallow or too deep both have their own problems, so it is imperative to get it right.
In general, the thinner your decorative stone (such as finely crushed gravel), the deeper your area needs to be to prevent the stones from loosely and freely moving around. If you are replacing a lawn with gravel, for example, you don’t want to make the area too shallow as this will cause bald patches and other similar issues.
In general, a lawn area will require around 2 inches of depth for your decorative rocks to be effective and utilised. Moreover, driveways will need approximately 3 inches of depth for the stones to perform properly.

While many people expect all rocks to be grey or a similar shade, they forget that decorative stones actually offer a wide range of colour choices. Of course, the choice of brightly coloured pink and blue rocks are not as popular as they once were but they are still an option if it is suited to your garden.
For the majority of gardens, however, natural colours are more likely to be of preference. Luckily, these colours are not as limited as you might think. There’s a whole spectrum of natural colours to choose from: whites, browns, beiges, blues, greys, purples and everything in between, these are all considered as natural colours as long as the style of your garden compliments them.
Always choose colours based on the style of your garden but, in general, remember that darker colours will absorb heat and create a completely different atmosphere compared to lighter colours. Lighter colours usually form a cooler, more ambient area.

In previous years, plastic has been the material of choice for base layers. But as time has gone on, gardeners have discovered that plastic will eventually breakdown through repeatedly walking on the surface and other factors.
The problem with this is that once the plastic has broken down, the weeds can then benefit from the sunlight which allows them to seep through the cracks and spread the rocks, altering the appearance of that particular area.
To fix this problem, a new material called weed barrier fabric is used. Unlike plastic, this material cleverly allows water and air through to the soil while still blocking out sunlight so weeds still do not grow. This fabric allows your garden designs to remain how you want them to for a very long period of time without the fear of weeds finding a way through.
A question that is frequently asked in the gardening world is, “Should I use bark mulch or rock mulch?” This question has multiple answers and will, ultimately, depend on the person. Though, decorative stones can provide many benefits to your garden that bark will struggle to compete with.
There are many features and elements in your garden that require regular maintenance to keep them looking fresh and new. This includes weeding and replacing certain products when they decompose or get old and worn.
For instance, bark mulch needs replacing at least once a year to maintain it’s purpose and aesthetic looks. Over a long period of time this can add up to be an expensive process, even though the initial cost of it is usually cheaper than other products like gravel.
Decorative stone like gravel and other rock mulch products, however, require hardly any maintenance at all. Although the initial price may be slightly more expensive compared to other products, it needs almost no care at all once installed.
Firstly, it does not decompose. This means it will not need to be replaced on a yearly basis like other products such as bark mulch. Also, it effectively stops a lot of sunlight reaching the soil so prevents weed growth too.
With no worry of replacing the stones next year or going out into your garden to find a bunch of weeds, these rocks will cause you almost no hassle whatsoever!
In the summer months, plants sometimes need to withstand extremely high temperatures depending on where in the world they live. This, occasionally, is posed as a threat to these plants as some of them will dry out due to over-exposure to the sun mixed with a lack of water.
From the use of decorative stones, your plants and their roots are protected from any chance of over-exposure as the rocks will take the brunt of the light and heat. This will give your plants a much higher likelihood of surviving as they will reap only the benefits from the sun instead of suffering from it.
In the winter months, roots and plants may become very cold and struggle to pull through. With the help of decorative stones, the roots will become insulated and so will be able to function normally.
Other mulch materials, like bark, offer only a limited amount of colour to your garden’s design; your limited choice of brown, black or sometimes grey may not cut it for what you are looking for.
The main purpose of decorative stones is to decorate a certain area. This means they should come with a wide range of colours to choose from, and they do.
As stated earlier in the guide, these rocks can come in a range of colours such as:
It all depends on what type of stone you are looking for, of course, but these colours allow every gardener to theme their garden exactly how they want it.
Now we know the different types of decorative stone and the benefits they can bring us, all we need to do is install them into the best areas possible.
These rocks can be used in many different areas to improve the look, design and many more aspects of your garden. But, they work best when used in the following areas:
Mulch is any material that is spread around or over a plant to enrich or insulate its soil – usually shredded wood chips, aged bark or chopped leaves. Rock mulch is similar; it also can be either spread around or over a plant to insulate its soil.
However, rock mulch is used for design and aesthetic purposes too. If you create a pathway which runs through your garden, you need a good looking material to surround your stepping stones to indicate the walkway clearly. Rock mulch is a great product to do this with.
With such a wide range of styles to choose from, as well as an array of colours to go with them, you will find the stone that suits your garden.
A ground cover is exactly what the name implies – a low growing plant that covers the ground and tends to prevent soil erosion.
When you have multiple different sections to your garden, the areas in between can sometimes be forgotten about. Areas within a garden will be separated with ground cover.
These low growing plants cannot be faulted for their ability to cover ground well. However, by being used in the right places, decorative stone can be an excellent replacement for the regular ground cover.
Instead of seeing the standard ground cover throughout the whole garden, you can split some of the areas up with decorative stone and this will provide your garden with a unique yet subtle twist to it.
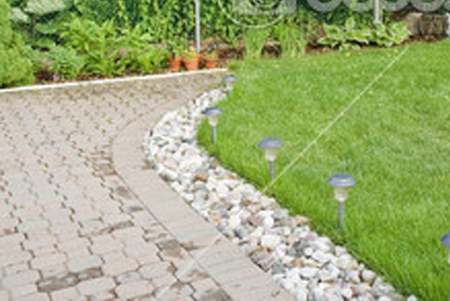
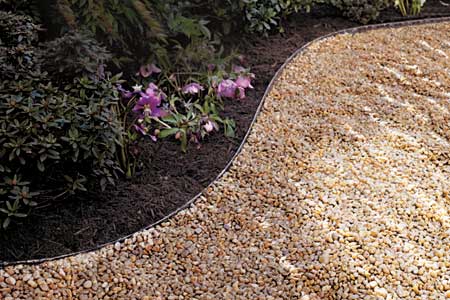
The majority of the features in your garden probably have some form of border or would benefit from having one. Whether you have a simple wooden border round your flower beds or a black pond liner surrounding your pond, they can be improved with a stylish yet easy to make border.
Adding a border to different areas in your garden completes the look of your landscape, while also keeping individual areas clearly separated from each other.

Source: http://www.hgtv.com/design/outdoor-design...
Identify the areas that need to be bordered and mark them out with either spray paint or a fine rope to make sure it’s as accurate as possible.
Do you have two separate elements to your garden that sit very close to each other? Eventually, the contents of one area will make its way into the other area through natural causes such as heavy rainfall or wind.
This leaves you, as a gardener, with the tedious job of returning the contents back to their original areas.
For example, if you have two areas which are covered by different materials – one containing bark mulch and the other covered by finely crushed gravel – then returning the correct materials to their designated areas could be extremely time consuming.
The style of your border depends on where and what you are bordering. There are a number of different rocks which are suitable for bordering, all of which, when used correctly, can drastically improve the aesthetics of your garden.
Marble, cobblestone and large river rocks are just three of the various decorative stones you can choose from. They all have different properties and will have specific areas in which they are best of use.
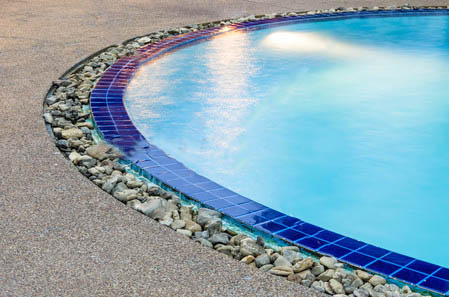
Cobblestone, for instance, would be great for bordering a large sculpture or fountain area. Where, in contrast, large river rocks would be a perfect match for surrounding a pond to hide the black lining and retain the natural, watery feel.
This is one of the hardest stages. The border itself needs to be deep enough to remain sturdy and firm but also high enough to clearly show a divide between different sections. In addition, you need to make sure it is not so high that it becomes a trip hazard or draws unwanted attention to itself – after all, it is there to divide the attractions in your garden, not to be one.
Use your border material as a guideline for your trench. You should make it so the top is a little bit higher than the ground surface of both sections but deep enough to remain stationary and firm through all weathers.
Once everything has been measured, marked and planned it is time to install the border. When doing so make sure each section of your border is of the same height.
If you are using large cobblestones, as an example, line each stone up with the one previously planted so they are always level – make sure that the space in between each stone is uniform throughout the border.
If you’re using any of the other border types, then make sure the same rules apply.

One of the best ways to decoratively split up the different features in your garden is by laying some form of walkway/pathway.
Walkways are a perfect addition to your garden. This is because they provide unique character to your garden as well as show clearly where to walk. Knowing where to walk is an essential part of a successful garden, without a clear path you could end up stepping on a valuable piece of the garden without even realising!
Laying a pathway is something you can do yourself – once you know what you’re doing, of course. This is why we’ve devised a simple step-by-step guide to help you along the way.
Source: http://www.thisoldhouse.com/toh/how-to...
The initial stage of almost every project in your garden is working out where you want the final product located and the dimensions of it. Once you’re sure on the positioning of your project, you then have to mark it out.
The recommended option for marking out your paths location is by using spray paint as it is extremely accurate and easy to follow, if you have no access to spray paint then rope is the next best option.
Once everything is ready, it is time to start digging. The best depth for a pathway of this sort is around 2-4 inches deep. It is a good idea to keep the path as flat as possible, this will prevent your stones from migrating downhill.
After digging out your pathway, it needs a border to contain the contents of your path. This ensures your stones will remain inside the pathway at all times instead of finding a way out into the grass.
Placing large stones in a single file along both sides of your path is one of the quickest and easiest methods of bordering. You can, of course, spend more time on the border once your path is complete by using the guide above.
But, large stones are the perfect option whilst the path is still being constructed and can actually be used in the final product due to their simple yet stylish look.
The sub base is the very first layer of material; it is usually an aggregate material.
Laying the sub base is a very important stage when constructing a pavement. If the pavement will only be withstanding foot traffic – like the majority of garden pathways – then the subbase can be omitted but we would always recommend laying it.
After laying the subbase, you now have to lay a line of weed barrier fabric. This fabric is a porous material which will prevent weeds from sprouting through and ruining the aesthetics of your path.
Ensure you cut the fabric lining slightly larger than the excavated area, this will allow you to tuck it under your border (the large rocks) and give a 100% certainty of no weed breakthroughs.
The fourth and final step is to lay your chosen decorative stones onto the path.
With all the previous steps taken care of and completed to a good standard, all you will need to do is pour your stones into the given area and even it out with a rake.
And that is all there is to it! With an occasional rake every now and then, you will have an even and fresh looking path all year round!
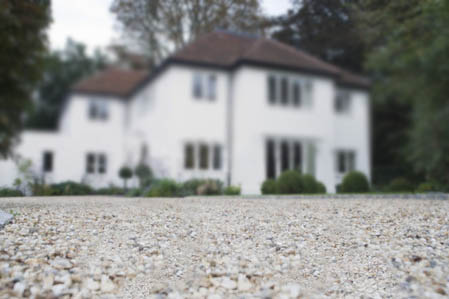
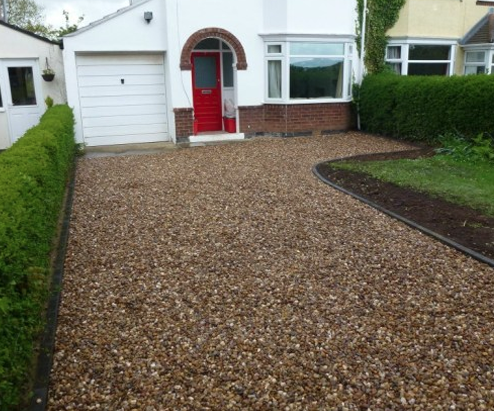
As well as the huge range of uses decorative rocks have for gardens, they can also be useful for driveways. Many driveways are either lawn based or plain concrete, decorative stones are an impressive replacement which can also add a lot more character to your property.
The rocks can prevent erosion caused by the weather due to their unique and beneficial porous properties as well as looking great!
Especially in the UK, decorative rock driveways (usually a type of gravel) are extremely popular. The weather in the UK isn’t the greatest, as we all know, so gravel driveways are an excellent way to keep the front of your property looking wonderful all year round!
If you live in an area where rainfall is frequent, a gravel driveway may be the best option for you. Unlike your standard concrete, block paved or slab driveways, gravel allows water through into the ground which means the chance of flooding is massively reduced.
You may think laying a gravel driveway is a task only for the professionals but it is not, with the right instructions and equipment, you can lay your own!
Once you’ve chosen your type of stone and how much you need – approximately, 1 bulk bag will cover 10m squared with a depth of 2 inches – it is time to start laying.
Source: https://blog.tbsmerchants.co.uk/tag/aggregate/
The ground where your driveway is located needs to be prepared before you can work on it. This means any slabs or turf that currently covers your drive needs to be removed. As a general rule, you’ll need to dig 2-3 inches of flat ground (or as flat as you can get it) for the gravel to work properly.
If the surface you are working on is uneven you will need a layer of crushed aggregate or something similar as a subbase to allow you to raise the surface until it is a lot more even. This will offer a good base for you to work on.
Once the base is laid it should be packed, this can easily be done by hiring a roller. The roller will ensure the crushed aggregate is compact, leaving it in the perfect state to work on for your driveway.
The entire surface of your driveway area needs to be covered in the fabric. This is an essential stage in your project as it will prevent weeds from sprouting through your drive, spoiling the look of it.
After laying the fabric you may want to edge it with bricks or another form of bordering, this will weigh it down and stop it from repositioning itself. However, this is not a necessary requirement as the stones that will fill your driveway will be heavy enough on their own so the choice is yours.
Now the preparation for your drive is complete, the only thing left to do is lay the gravel. Order your gravel and once it comes remember to place the pile in an area that causes minimal damage.
Begin to spread the gravel across your driveway at a depth of around 2-3 inches until the whole area is filled. You can choose to use a gravel paving grid as this can provide a stable base for the gravel and reduces the chances of slipping.
The grids are simple and easy to use but are not an essential requirement to complete your gravel driveway.
Once all the gravel has been spread, level it off with a rake and your beautiful, all-weather driveway is finished and ready for use!
As stated previously, using decorative stones on top of soil prevents plant roots from being over-exposed to the sun as well as stopping weeds from growing. This is one of the main reasons why it is so common to see rocks on top of soil as it is a very effective way to keep your plants healthier for longer.
As well as blocking weeds from growing, placing the right stones on top of soil will also help water drainage. If you live in an area that has a lot of rain, your plants may be drowning in the amount of water it is receiving on a regular basis.
By adding porous rocks on top of your soil, they will absorb a lot of the rain water. This gives the soil the opportunity to benefit from a respectable amount of water instead of way too much.
Globally, decorative stones have become one of the most popular features to use for garden designers and landscape architects. And who can blame them? These rocks are extremely versatile and can offer a wide range of benefits to your garden or landscape.
Whether you want a better looking driveway or a more aesthetically pleasing pond in your garden, decorative stones can help to improve your desired projects.
With the right type of lining, decorative rocks can significantly reduce the amount of manual labour needed for your garden on a regular basis as well as make it a cheaper operation to manage.
This can be from covering soil to reduce the chances of weeds sprouting, all the way up to not needing to cut the grass by completely replacing a lawn!
The many different styles of decorative stones make them very useful in a lot of different aspects of the garden. The variety of types you can choose from allows them to offer an array of colours, sizes and shapes to your garden.
Ultimately, with the correct use of these stones you can transform the duller parts of your garden to areas filled with a variety of colours and textures, making your landscape even more pleasing to the eye.